Photo by Zoltan Tasi on Unsplash
I had a chance to update a legacy ASP.NET MVC website using AngularJS (yes, the first version) to use Webpack & Babel 7 (which used to import AngularJS files using script tags).
Previous post Setting up an ES6 Environment for ASP.NET MVC 5 was a bit outdated as it was using older version of babel and webpack, so I decided write more concise post to get started with the newest libraries.
As I have moved onto React, I will show you how to set up React environment for ASP.NET MVC 5.
🧐 Prerequisite
I will assume that you are familiar with NPM & Webpack, so I won't go into too much details on what each option in NPM & Webpack.
👣 Setup Steps
- Create an ASP.NET MVC web site
- Create & configure NPM configuration file (package.json)
- Create & configure Babel configuration file (.babelrc)
- Create & configure Webpack configuration file (webpack.config.js)
- Install NPM packages
- Install Visual Studio Extensions (NPM Task Runner)
1. Create an ASP.NET MVC web site
Create a new ASP.NET MVC project (choose a choice of your .NET framework).

And select a template.

2. Create & configure NPM configuration file (package.json)
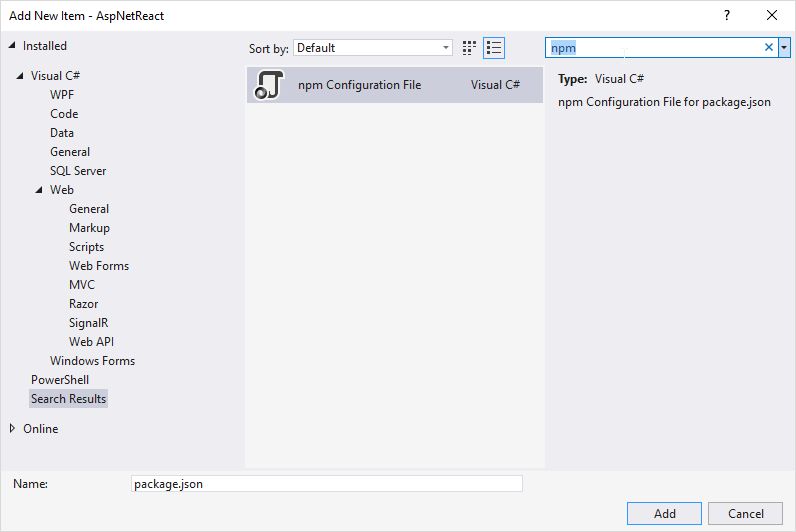
Add a new item in the project root.
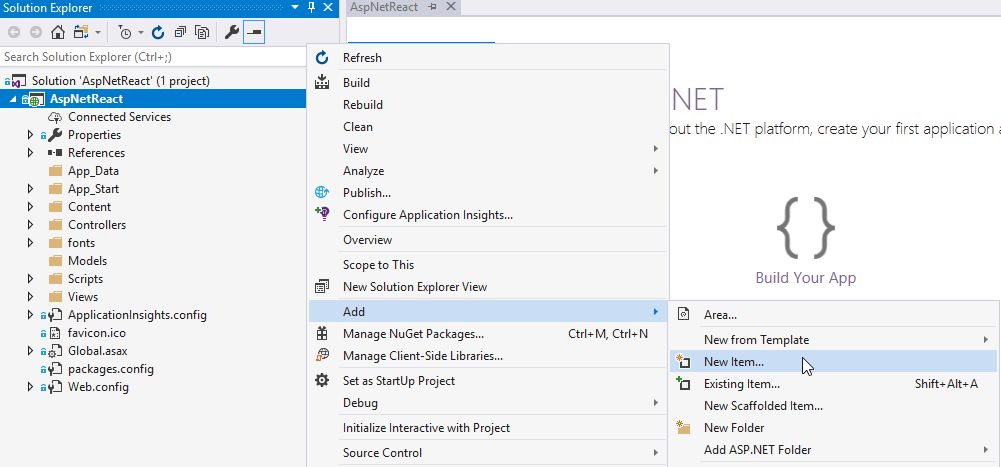
Create NPM configuration file, package.json.
And add a script section. And package.json would initially look like the following.
| { | |
| "version": "1.0.0", | |
| "name": "asp.net", | |
| "private": true, | |
| "scripts": { | |
| "dev": "webpack --mode development --watch", | |
| "build": "webpack" | |
| }, | |
| "devDependencies": {} | |
| } |
3. Create & configure Babel configuration file (.babelrc)
Add a new file named .babelrc in the same directory as package.json file created in the previous step.
And add following babel options.
| { | |
| "presets": ["@babel/preset-env", "@babel/preset-react"], | |
| "plugins": ["@babel/plugin-proposal-class-properties"] | |
| } |
- @babel/preset-env - enables latest JavaScript syntax
- @babel/preset-react - adds support for React syntax
- @babel/plugin-proposal-class-properties - adds support for an instance and/or static member declarations in JavaScript classes.
4. Create & configure Webpack configuration file (webpack.config.js)
Create a file named webpack.config.js in the project root (same location as package.json & .babelrc) & configure it as shown below.
| "use strict"; | |
| var path = require("path"); | |
| var WebpackNotifierPlugin = require("webpack-notifier"); | |
| var BrowserSyncPlugin = require("browser-sync-webpack-plugin"); | |
| module.exports = { | |
| entry: "./Scripts/Home/react/index.js", | |
| output: { | |
| path: path.resolve(__dirname, "./Scripts/dist/Home/react"), | |
| filename: "bundle.js" | |
| }, | |
| module: { | |
| rules: [ | |
| { | |
| test: /\.js$/, | |
| exclude: /node_modules/, | |
| use: { | |
| loader: "babel-loader" | |
| } | |
| } | |
| ] | |
| }, | |
| devtool: "inline-source-map", | |
| plugins: [new WebpackNotifierPlugin(), new BrowserSyncPlugin()] | |
| }; |
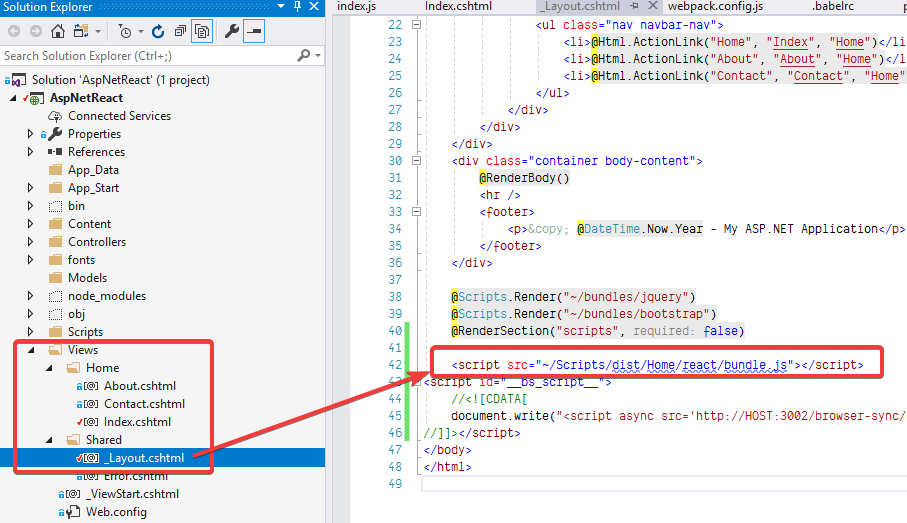
Webpack outputs a bundle as ./Scripts/dist/Home/react/bundle.js so let's add the script in View\Home\Index.cshtml razor file.
| <script src="~/Scripts/dist/Home/react/bundle.js"></script> |
5. Install NPM packages
Now let's install NPM packages to enable latest JavaScript and React syntax.
| npm install --save-dev @babel/cli @babel/core @babel/plugin-proposal-class-properties @babel/preset-env @babel/preset-react babel-loader browser-sync browser-sync-webpack-plugin webpack webpack-cli webpack-notifier |
| npm install react react-dom |
- babel-loader - Webpack loader for babel
- browser-sync & browser-sync-webpack-plugin - sync'ing browser upon code change
- webpack & webpack-cli - for running Webpack
- webpack-notifier - Shows pretty webpack notification
- react & react-dom - React library
6. Install Visual Studio Extensions (NPM Task Runner)
This is an optional step but to make our lives easier, let's install a Visual Studio extension, NPM Task Runner for running NPM scripts from Visual Studio.

⚛ Let's write some React code
Now we are ready to write a React script using the latest JavaScript syntax (ES6+).
Let's add an entry point for React in Views\Home\Index.cshtml file by deleting everything except ViewBag.Title section and add <div id="app"></div>.
Now we have an entry point, let's write a simple React file index.js under Scripts\Home\react directory.
| import React from 'react'; | |
| import { render } from 'react-dom'; | |
| const App = () => ( | |
| <React.Fragment> | |
| <h1>React in ASP.NET MVC!</h1> | |
| <div>Hello React World</div> | |
| </React.Fragment> | |
| ); | |
| render(<App />, document.getElementById('app')); |

🏃♀️Transpiling and Running
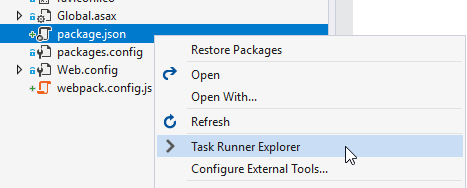
You could run the dev script within package.json file but let's use the NPM task runner to make the life easier.
Open the "Task Runner Explorer" by right clicking on package.json file in the project root.
Start dev script (double click), which monitors the changes in index.js.
To enable browser-sync, you need copy a script generated by browser-sync message in _Layout.cshtml under Shared folder near end of </body> tag.

And lastly, let's run ASP.NET from Visual Studio to see the result.
♻ Reloading Browser Automatically
You've installed browser-sync* packages so as you change your code, the browser will reload automatically upon saving.
browser-sync at work
👋 Parting Words
In this post I've assumed that you know the basics of NPM & Webpack so skipped much of details so that you can easily get up and running.
Please refer to documentations linked in-line in the post if you want to understand how each step works and to troubleshoot should you run into an issue.
Source code is available on GitHub.