UPDATE: October 13th, 2018
Following post uses Babel 7 & Webpack 4.
https://sung.codes/blog/2018/10/13/setting-up-a-react-environment-for-asp-net-mvc/
I still haven't moved to ASP.NET Core and still use ASP.NET MVC. As I am learning ES6 features I've been looking for articles for setting up an environment for ES6 for ASP.NET MVC.
Unfortunately, all the articles I've run into dealt with ASP.NET Core and had to come up with my own way after combining all the resources I've been reading and watching.
This article with show you how to set up ASP.NET MVC 5 to enable ES6 javascript development using Webpack and Babel.
UPDATE: 6/13/2018 Works for Webpack 4 - Thank you, Brent Labasan😁
UPDATE: 1/13/2018 Added npm-watch to make the refreshing easier (Thank you, digiface & Frank Nguyen for the feedback 👍)
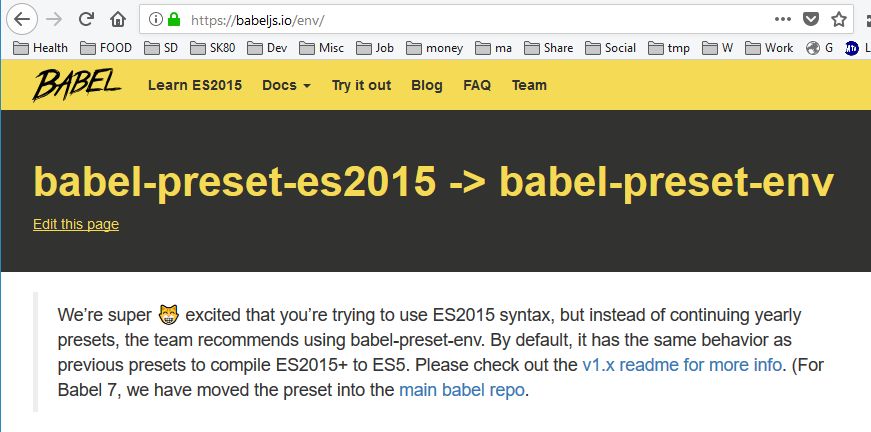
UPDATE: 1/7/2018 Babel preset used changed from babel-preset-es2015 to babel-preset-env according to Babel's recommendation.
UPDATE: 9/22/2017
I created a 5-minute walkthrough video.
Step by Step Guide
- Set up ASP.NET MVC 5
- Set up NPM configuration and packages
- Install Webpack and Babel
- Create some ES6 javascript files
- Create an ASP.NET Controller and a View
- Configure Webpack
- Configure Babel
- Run ASP.NET MVC
- Monitoring file changes with npm-watch
1. Set up ASP.NET MVC 5
Create a new solution in Visual Studio. I am using VS 2015 Professional.
Create a new ASP.NET MVC 5 project.
Right click on Solution and then "Add -> New Project".
Select an "Empty" template with "MVC" option.

2. Set up NPM configuration and packages
Open cmd and go to the root of the project.
Create a new "package.json" configuration file for NPM by running following command.
npm init -y
"-y" option creates a new file without prompting the user.
3. Install Webpack and Babel
Run the following command in cmd.
npm install --save-dev webpack babel-core babel-loader babel-polyfill babel-preset-env
Above command will install necessary packages for Babel and Webpack.
Now let's include package.json in VS Solution Explorer. Go to "Solution Explorer", and click on "Show All Files" button.
"package.json" will show up in the explorer.
Right click on "package.json" and include it in the project.


If you open up "package.json", you can see that "devDependencies" section has references to Babel and Webpack.
1"devDependencies": {2"babel-core": "^6.26.0",3"babel-loader": "^7.1.2",4"babel-polyfill": "^6.26.0",5"babel-preset-env": "^1.6.1",6"webpack": "^3.10.0"7}
4. Create some ES6 javascript files
 Let's create some javascript files to transpile for a test.
Under project root, create a folder "Scripts" if one doesn't exist.
Create two more folders, "build" and "es6" under "Scripts".
Create two javascript files under "es6" folder.
- person.js: contains "Person" class.
- main.js: main entry point for the application.
person.js
1export default class Person {2  constructor(name, age) {3    this.name = name;4    this.age = age;5  }6
7  speak() {8    console.log(`Hi I'm ${this.name} and ${this.age} years old and I am awesome`);9  }10}
main.js
1import Person from "./person";2
3var person = new Person("David", 20);4person.speak();
5. Create an ASP.NET Controller and a View
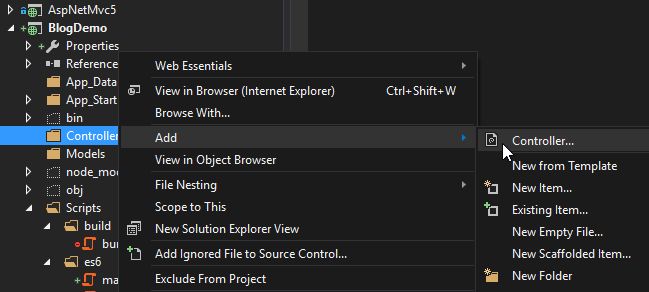
Right click on "Controllers" folder, and create an empty controller named, "HomeController".
Right click on "View()" and click on "Add View".

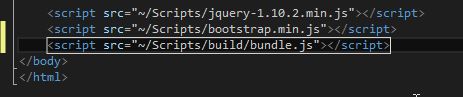
Add a script tag in Views/Shared/_Layout.cshtml.
<script src="~/Scripts/build/bundle.js"></script>
6. Configure Webpack
Create webpack.config.js on project root. Add following configuration option in the file.
| const path = require('path'); | |
| module.exports = { | |
| entry: ['./Scripts/es6/main.js'], | |
| output: { | |
| path: path.resolve(__dirname, './Scripts/build'), | |
| filename: 'bundle.js' | |
| }, | |
| // IMPORTANT NOTE: If you are using Webpack 2 or above, replace "loaders" with "rules" | |
| module: { | |
| loaders: [{ | |
| loader: 'babel-loader', | |
| test: /\.js$/, | |
| exclude: /node_modules/ | |
| }] | |
| } | |
| } |
- "entry" indicates files for webpack to work on.
- "output" specifies which folder ("path") to write to while "filename" specifies what the result file name should be.
- "module" instructs webpack to use Babel to transpile.
- "test" tells webpack to include all files with ".js" extension while "exclude" leaves out "node_module" folder.
** IMPORTANT **: If you are using Webpack 2 or above, replace loaders with rules in webpack.config.js.
Refer to this article on migrating from Webpack 1 to Webpack 2.
Now let's update "package.json" to instruct NPM to call webpack.
Add a "scripts" section.
1"scripts": {2"build": "webpack"3},
We can configure Visual Studio to run npm run build during compile time.
Right-click on the project and select "properties" and go to "Build Events".
In the "Pre-build event command line:" enter following code snippet to run webpack when you compile the project.
npm run build --prefix $(ProjectDir)

7. Configure Babel
Open "package.json" and add Babel Preset.
1"babel": {2 "presets": [ "env" ]3},
Presets are basically a set of plugins so that you don't have to specify every plugin that are needed by Babel one by one. I will use ES2015 preset, which includes all Babel plugins listed here.
You can find a list of all Official Babel Presets in this link.
8. Run ASP.NET MVC
Run the project by pressing "F5".
If you see "Hi I'm David and 20 years old and I am awesome", then it's set up properly.

9. Monitoring file changes with npm-watch
Everything up and running now but the problem is that when you make a file change and refresh the browser, the change would not take an effect.
There are many ways to monitor files changes but I will show you how to install and configure npm-watch to do so. Let's install the npm-watch via NPM command.
npm install --save-dev npm-watch
We need to add a configuration for the command installed in package.json.
1"watch": {2 "build": "Scripts/es6/.js"3},4"scripts": {5 "watch": "npm-watch",6 "build": "webpack"7},
Now run npm run watch in the command line window after changing to the project directory where package.json is located (You can also run the command while the Visual Studio is in the debug/run mode).
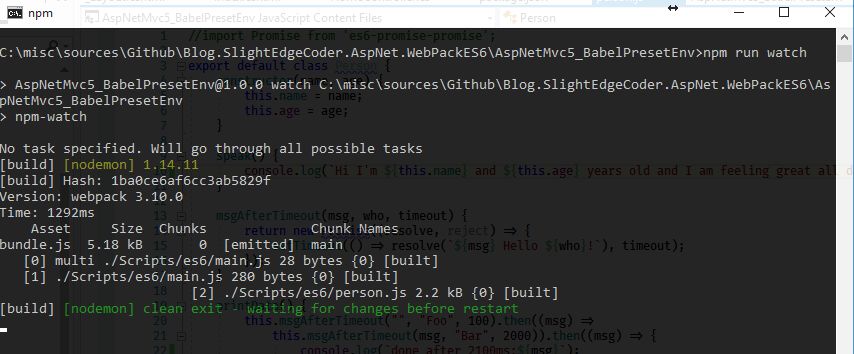
The command will watch for the javascript file changes. Let's update the speak() method in person.js file while the Visual Studio is in debug mode.
1export default class Person {2//... constructor...3 speak() {4 console.log(`Hi I'm ${this.name} and ${this.age} years old and I love CodingBlocks podcast!`);5 }6...
Refresh the browser and you will see that the content has changed without restarting Visual Studio.
 You can see that npm-watch monitored the javascript file change and ran the build/webpack command automatically.

If you are using npm-watch, you can clear the "Pre-build event command line" command added in step 6 (because npm-watch runs the build script, which calls webpack in turn).
![]()
Conclusion
I described how to set up ASP.NET MVC 5 web application for ES6 using Webpack and Babel. The "ceremony" seems too much of trouble. If you are ready to move on to ASP.NET Core, it'd be easier to do so (even though most of the steps would be the same) and you can find much more resources on how to do so.
The full source for this demo is avaialble on GitHub. The new source using babel-preset-env is on the same repository but in different folder AspNetMvc5_BabelPresetEnv.